PEUGEOT HDI TIMING BELT INSTALLATION

Peugeot hdi 206 1.4 HDi 8HX/8HZ
The timing belt system may look a little
tricky to change, but with a little know-how
and the appropriate tools, it will prove to be
an ideal repair for an independent garage.
The engine has been identified as an
interference type, so in the event of the timing
belt failing, chance of engine damage is
extremely high. It is important to install a new
timing belt system on an engine while it is at
ambient room temperature. Always adhere to
turning the engine in the normal direction of
rotation unless advised otherwise by the OEM
installation instructions. Recommended torque
values should always be used. It is
recommended that all the tensioners, idlers
and fixings are replaced as advised by the
manufacturer during the timing belt
replacement.
A two post ramp is ideal for carrying out
timing belt replacements, it is also vital that
the appropriate timing belt replacement tools
are available and used, and these are readily
available from most motor factors. If the
vehicle is equipped with alloy wheels, it’s a
good idea to locate the adaptor key before
you start.
Once the vehicle is on the ramp, for
safety reasons and best practice, we
disconnected the negative battery lead.
Remove the O/S/F wheel and wheel arch
liner; this gives access to a plastic shield which
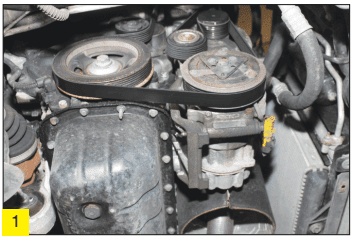
can then be removed. The auxiliary drive belt is
now fully visible and accessible (fig 1), make a

note of routing if required, rotate the auxiliary
belt tensioner clockwise to the released
position, lock with a pin, remove the auxiliary
belt and check for wear and deterioration.
Replacement is advised during timing belt
replacement.
This vehicle was also fitted with an Over
Running Alternator Pulley (OAP) which should
also be tested for correct operation and
replaced if necessary. At this point, unclip the
wiring harness from the lower timing belt
cover that goes to the crank sensor and detach
from the crank sensor and remove the auxiliary
belt tensioner.
Lower the vehicle close to ground level,
unclip the wiring and fuel pipes from the top
timing belt cover, support the engine either by
means of an engine brace or engine support
beam, remove the engine control unit from
the engine bay, remove the engine mount
cover, rubber bump stop and the engine
mount. Undo the five bolts in the top timing
belt cover and remove.
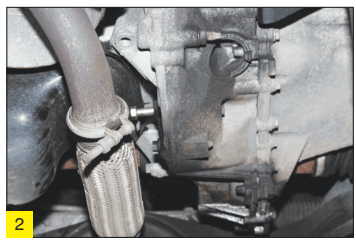
Raise the vehicle, insert the crank locking
pin from the back of the engine through and
into the back of the flywheel (this is a locking
device not a timing location), located in a
central position (fig 2). Undo the centre bolt

on the crankshaft pulley and remove pulley
and locking pin, remove the crankshaft
position sensor and shield. Undo the five lower
timing belt cover bolts and remove the cover.
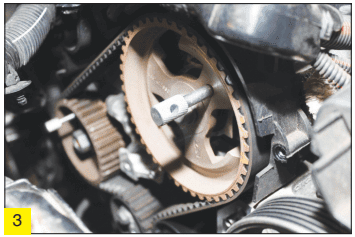
Refit crankshaft pulley bolt and rotate engine
until crank, cam and fuel pump locations align.
Lock crank, cam and fuel pump with pins (figs
3 and 4), slacken the tensioner and remove,
and then remove the timing belt.
Carry out a thorough inspection of the
timing belt area including pulleys and water
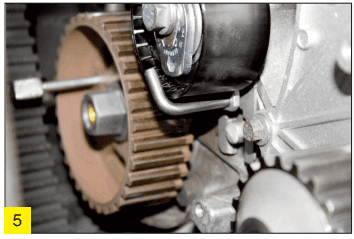
pump. Replace the timing belt tensioner,
making sure it is located correctly (fig 5), idler

and fixings supplied. Replace the tensioner
bolt, the idler and stud. Fit the new timing belt
in the following order, crankshaft, idler,
camshaft, water pump, fuel pump and then
the tensioner. Tension the belt by aligning the
marks on the tensioner and torque bolt. As per
instructions, rotate the engine ten revolutions
and recheck timing and tension, (when we
carried this out the fuel pump locking pin did
not line up, after two more rotations it all
aligned and locked with the pins).
Refit all components, reconnect battery
lead and remember to reset the clock, radio
code, electric windows and remote locking.
Run the engine to ensure all is correct.
Malcolm Short, Schaeffler
Timing belt replacement is due every 140-160,000 miles, or 10 years whatever comes first, depending on date of manufacture, but always check the manufactures recommendations. INA takes a closer look at this popular model.

