Free factory auto repair manuals PDF

All content available on this site is sourced from free outlets and is distributed without charge. If you are the rightful author of any material found here, we encourage you to reach out to us. Your cooperation allows us to offer users a pleasant and convenient alternative, such as the purchase of a high-quality “original” directly from the publisher.
The site administration explicitly disclaims responsibility for any illegal actions and any potential damage caused to copyright holders. All materials are presented on the site for informational purposes. If you are the copyright holder of any materials posted on this site, please contact us for appropriate resolution.
By clicking on the download link, you acknowledge and agree that, upon reading, you will promptly delete the downloaded file from your device.
Free car repair manuals pdf download
Get access to a wide range of free factory auto repair manuals PDF for all your automotive repair and service needs.
Title: Mastering the Craft: Automotive Mechanical and Electrical Repair – Free factory auto repair manuals PDF – Free repair manuals
Introduction:
Automotive mechanical and electrical repair is both a science and an art, requiring a deep understanding of complex systems and a keen eye for detail. From diagnosing engine issues to troubleshooting electrical problems, automotive technicians play a crucial role in keeping vehicles running smoothly and safely on the road. In this comprehensive guide, we’ll explore the fundamentals of automotive mechanical and electrical repair, from common repair procedures to advanced diagnostics and techniques.
Understanding Automotive Systems:
Modern vehicles are equipped with a multitude of mechanical and electrical systems that work together to ensure optimal performance, comfort, and safety. Some of the key systems include:
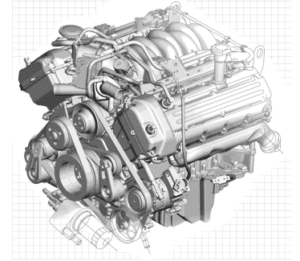
- Engine: The heart of the vehicle, responsible for generating power and propelling the vehicle forward. Engine repairs may involve diagnosing and fixing issues such as misfires, overheating, or oil leaks.
- Transmission: Transfers power from the engine to the wheels, allowing the vehicle to change speed and direction. Transmission repairs may include servicing fluid, replacing worn components, or diagnosing shifting issues.
- Suspension and Steering: Provides stability, control, and comfort by absorbing shocks and vibrations and maintaining proper wheel alignment. Suspension and steering repairs may involve replacing worn shocks, struts, or steering components.
- Electrical: Controls various vehicle functions, including lighting, entertainment, climate control, and safety features. Electrical repairs may include diagnosing and fixing issues with fuses, relays, wiring, or electronic modules.
Common Repair Procedures:
Automotive mechanical and electrical repair encompasses a wide range of procedures, from routine maintenance tasks to complex repairs. Some of the most common repair procedures include:
- Oil Change: Regularly changing the engine oil and filter helps lubricate engine components, reduce friction, and prevent wear and tear. Oil changes are essential for maintaining engine performance and prolonging engine life.
- Brake Service: Inspecting and servicing brake components, such as pads, rotors, and calipers, ensures safe and reliable braking performance. Brake service may involve replacing worn parts, flushing brake fluid, or adjusting brake systems.
- Tune-Up: Performing a tune-up involves inspecting and servicing various engine components, such as spark plugs, ignition coils, and fuel injectors, to optimize engine performance and fuel efficiency.
- Battery Replacement: Replacing a worn or faulty battery ensures reliable starting and electrical system operation. Battery replacement may be necessary if the battery fails to hold a charge or exhibits signs of corrosion or damage.
Advanced Diagnostics and Techniques:
In addition to common repair procedures, automotive technicians must be proficient in advanced diagnostics and techniques to address complex issues effectively. Some of these techniques include:
- Computer Diagnostics: Using specialized diagnostic tools and software to retrieve trouble codes and analyze data from the vehicle’s onboard computer systems. Computer diagnostics help identify and diagnose electronic and mechanical issues more efficiently.
- Component Testing: Testing individual components, such as sensors, actuators, and modules, to determine if they are functioning properly. Component testing may involve using multimeters, oscilloscopes, or other diagnostic equipment to measure voltage, resistance, or signal patterns.
- Wiring Diagrams: Referencing wiring diagrams and schematics to trace electrical circuits, identify connections, and troubleshoot wiring issues. Wiring diagrams help technicians understand the layout and operation of electrical systems and pinpoint potential sources of problems.
- Technical Service Bulletins (TSBs): Consulting manufacturer-issued TSBs for known issues, recalls, or recommended repair procedures related to specific vehicle models. TSBs provide valuable information and guidance for addressing common problems and ensuring proper repairs.
Conclusion:
In conclusion, automotive mechanical and electrical repair requires a combination of technical knowledge, practical skills, and diagnostic expertise. From routine maintenance tasks to complex repairs, automotive technicians play a vital role in keeping vehicles safe, reliable, and roadworthy. By understanding the fundamentals of automotive systems, mastering common repair procedures, and staying abreast of advancements in diagnostic techniques and technologies, technicians can effectively diagnose and address a wide range of mechanical and electrical issues. Whether it’s replacing a worn brake pad, diagnosing an engine misfire, or troubleshooting a complex electrical problem, automotive repair technicians are the unsung heroes who keep vehicles running smoothly and safely on the road.
Free factory auto repair manuals PDF – Free repair manuals
Get access to a wide range of free factory auto repair manuals PDF for all your automotive repair and service needs.
Free factory auto repair manuals PDF
[seopress_html_sitemap]

